
Terminals
Access mode: the door screen
Access mode is the everyday door screen: the camera fills the iPad, recognition runs continuously and the only touch targets are the buttons you configure. This guide covers recognition, visitor sign-in, secondary methods and the locked-down behaviour.
5 min read · 5 steps
- 1
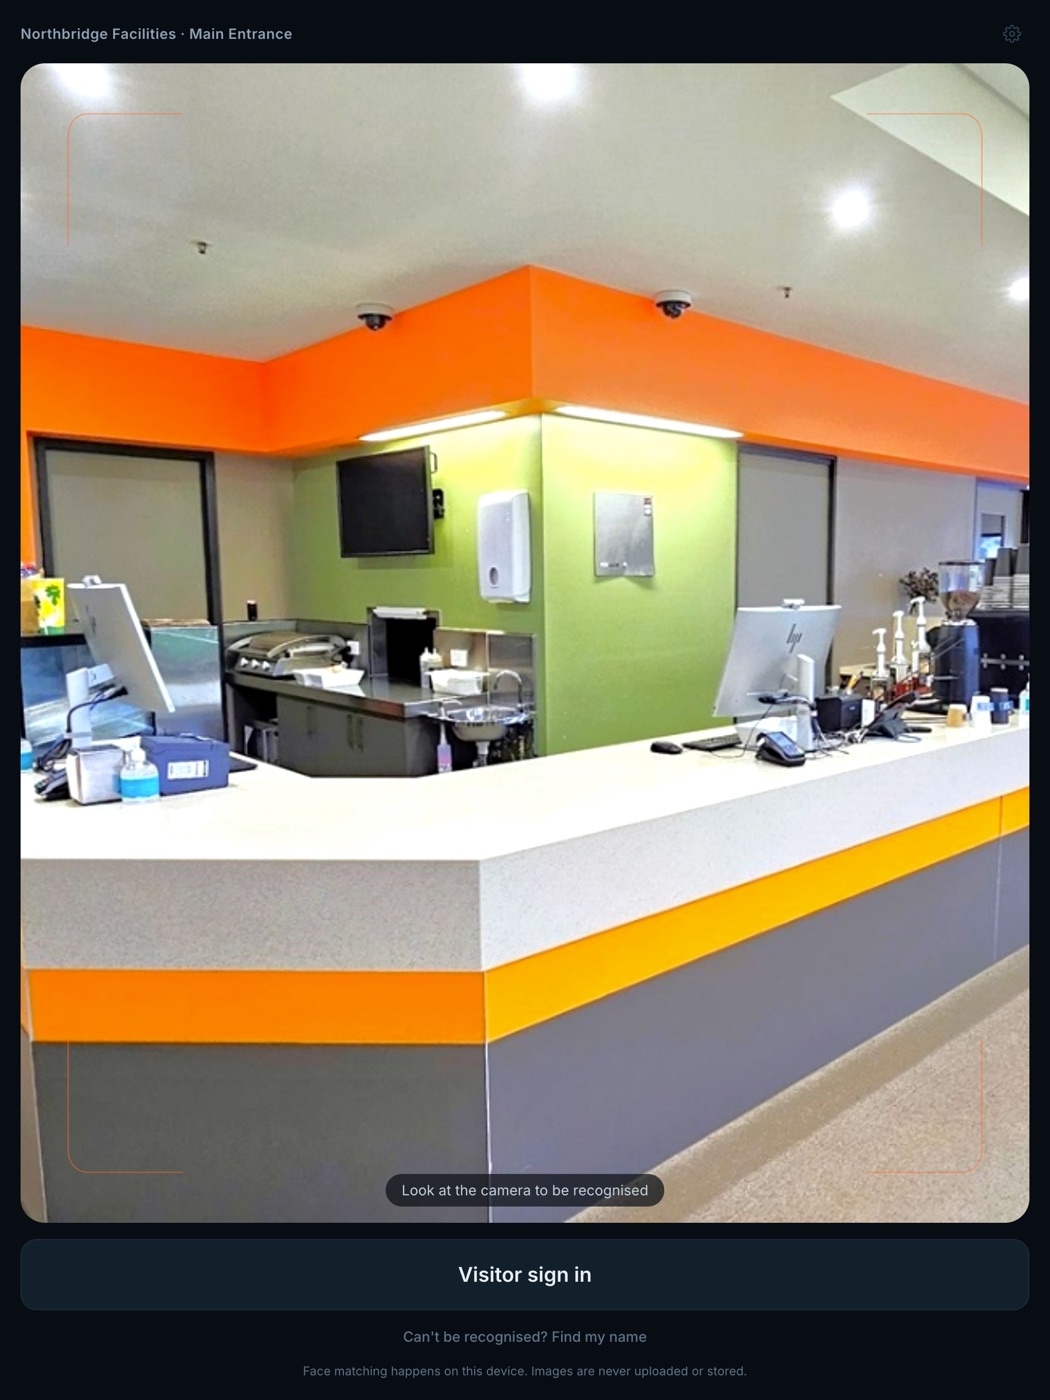
The locked access screen
In Access mode the camera fills the screen with the site name plus entry name at the top. The iPad is locked to this screen: the only touch targets are the buttons you have configured plus a small PIN-protected settings gear.
- 2
Recognition
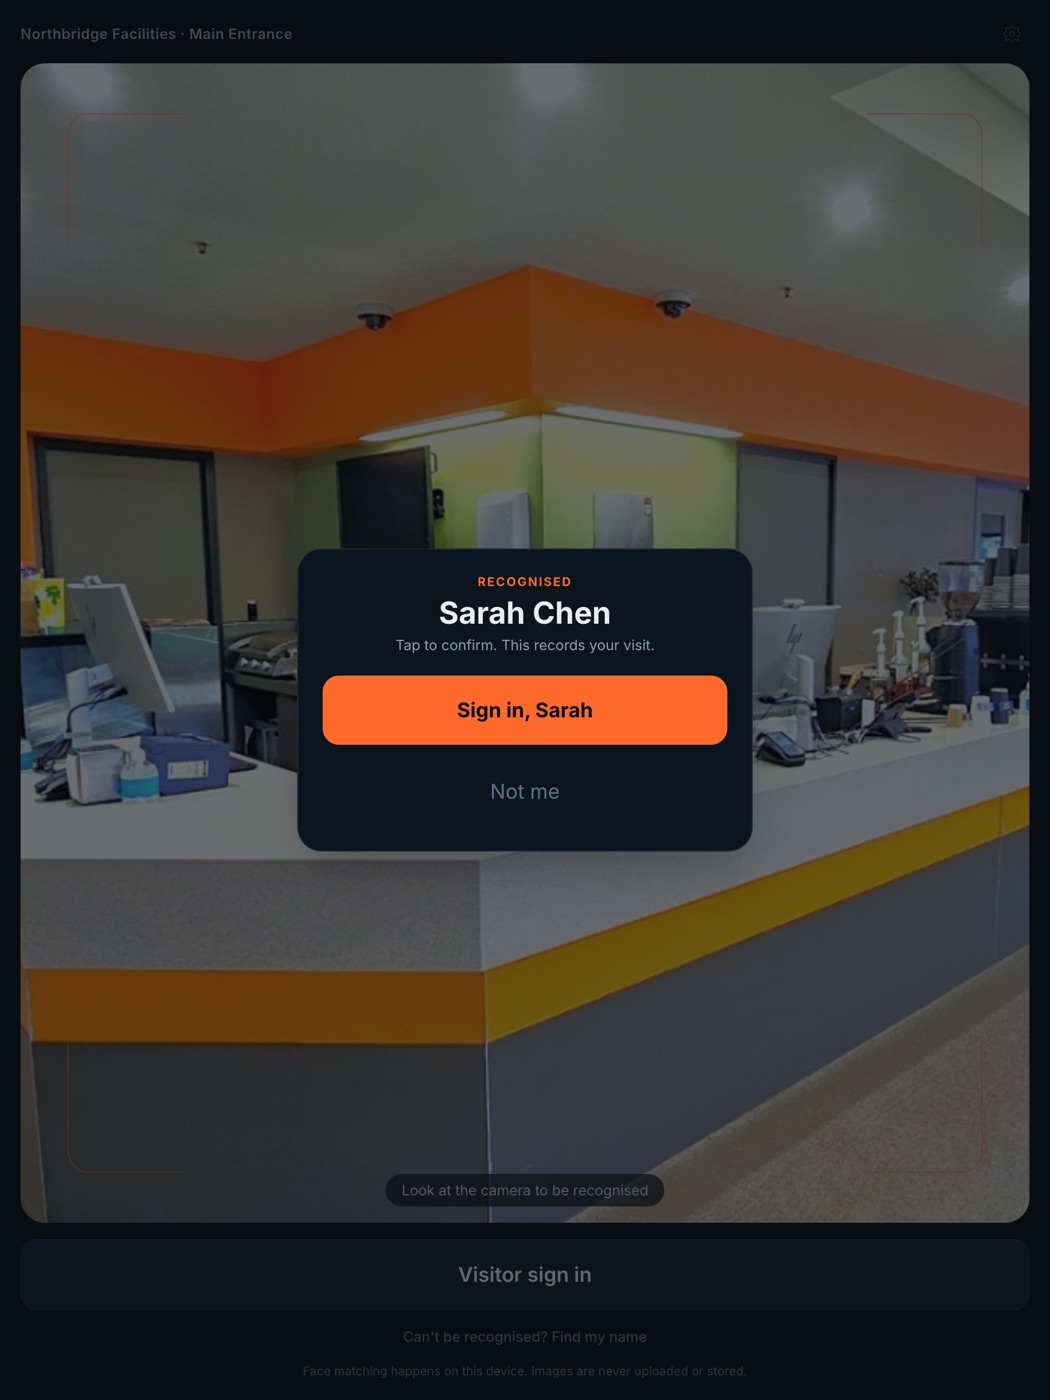
The terminal scans continuously. In Auto scan mode a recognised person is signed straight in or out. In Manual confirm mode their first name pops up with a Sign in button; the entry records only when they press it.
- 3
Visitor sign in
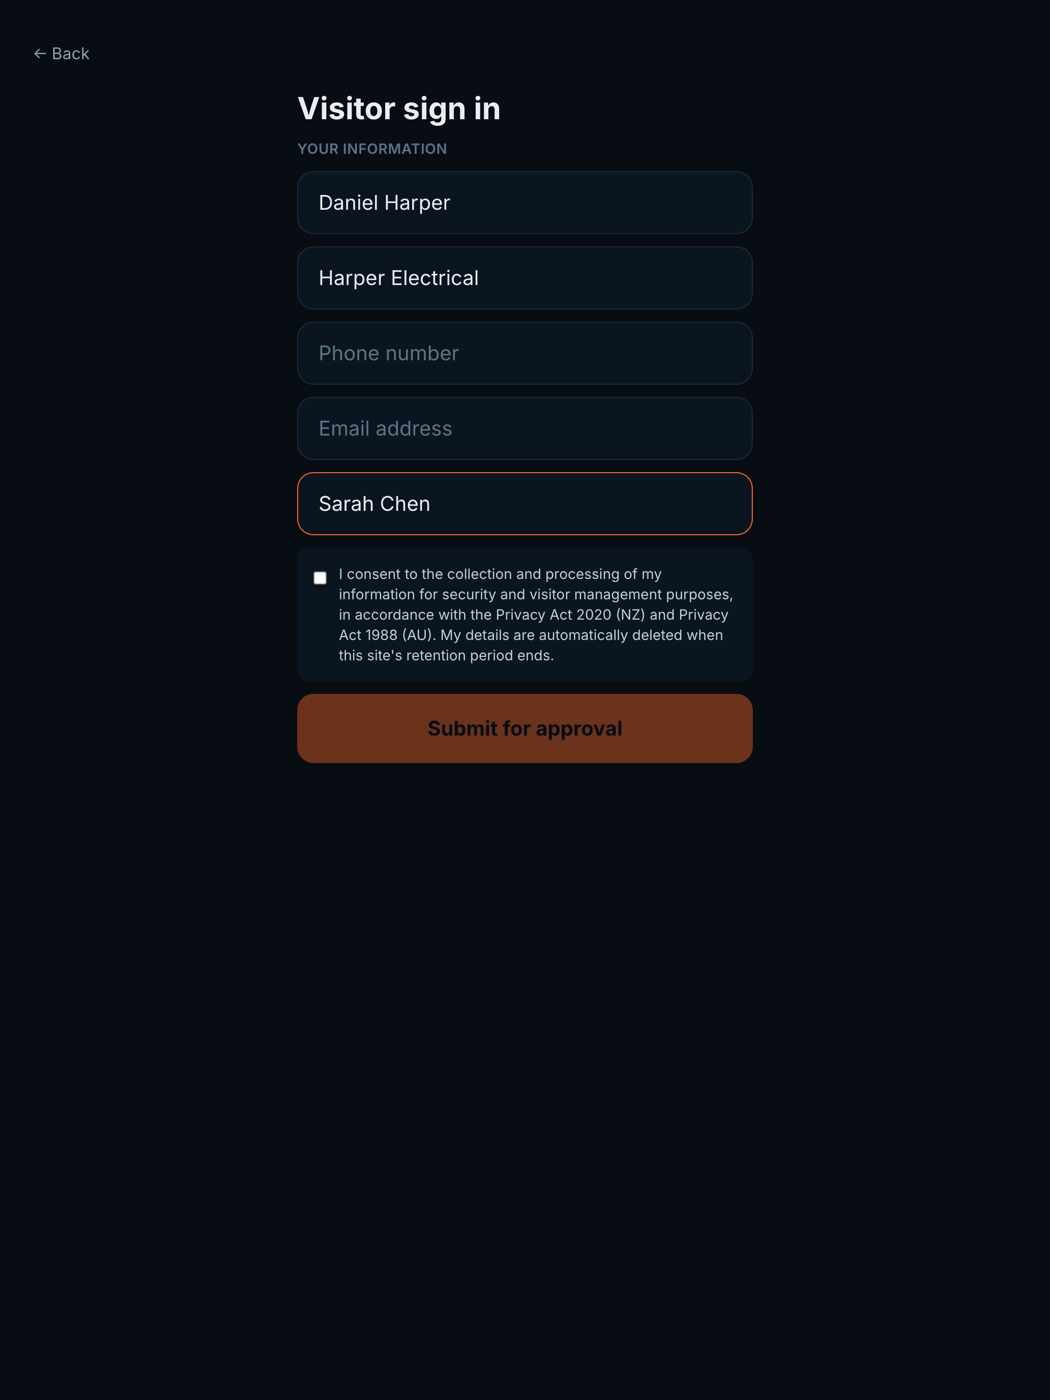
The Visitor sign in button below the camera opens a short form: name, company, who they are visiting. Depending on the site's approval mode they are let through or held for an admin to approve.
- 4
Secondary method buttons
When the site (or this terminal) enables PIN or Card / QR as secondary methods, matching buttons appear above Visitor sign in. People who cannot use face recognition sign in with their PIN or by presenting their card's QR code to the camera.
- 5
Can't be recognised?
When Manual confirm mode is on, a small Find my name link lets someone search the roster by name as a fallback, with an optional company filter to narrow the list.
Using iENTR at a gym? See how the whole system fits your door.
iENTR for gyms and fitness →Related guides
Try it on one door.
Seven days free, cancel any time. Mount the iPad, pair it with one code and you are running inside half an hour.