
ID cards & QR codes
Designing your ID card
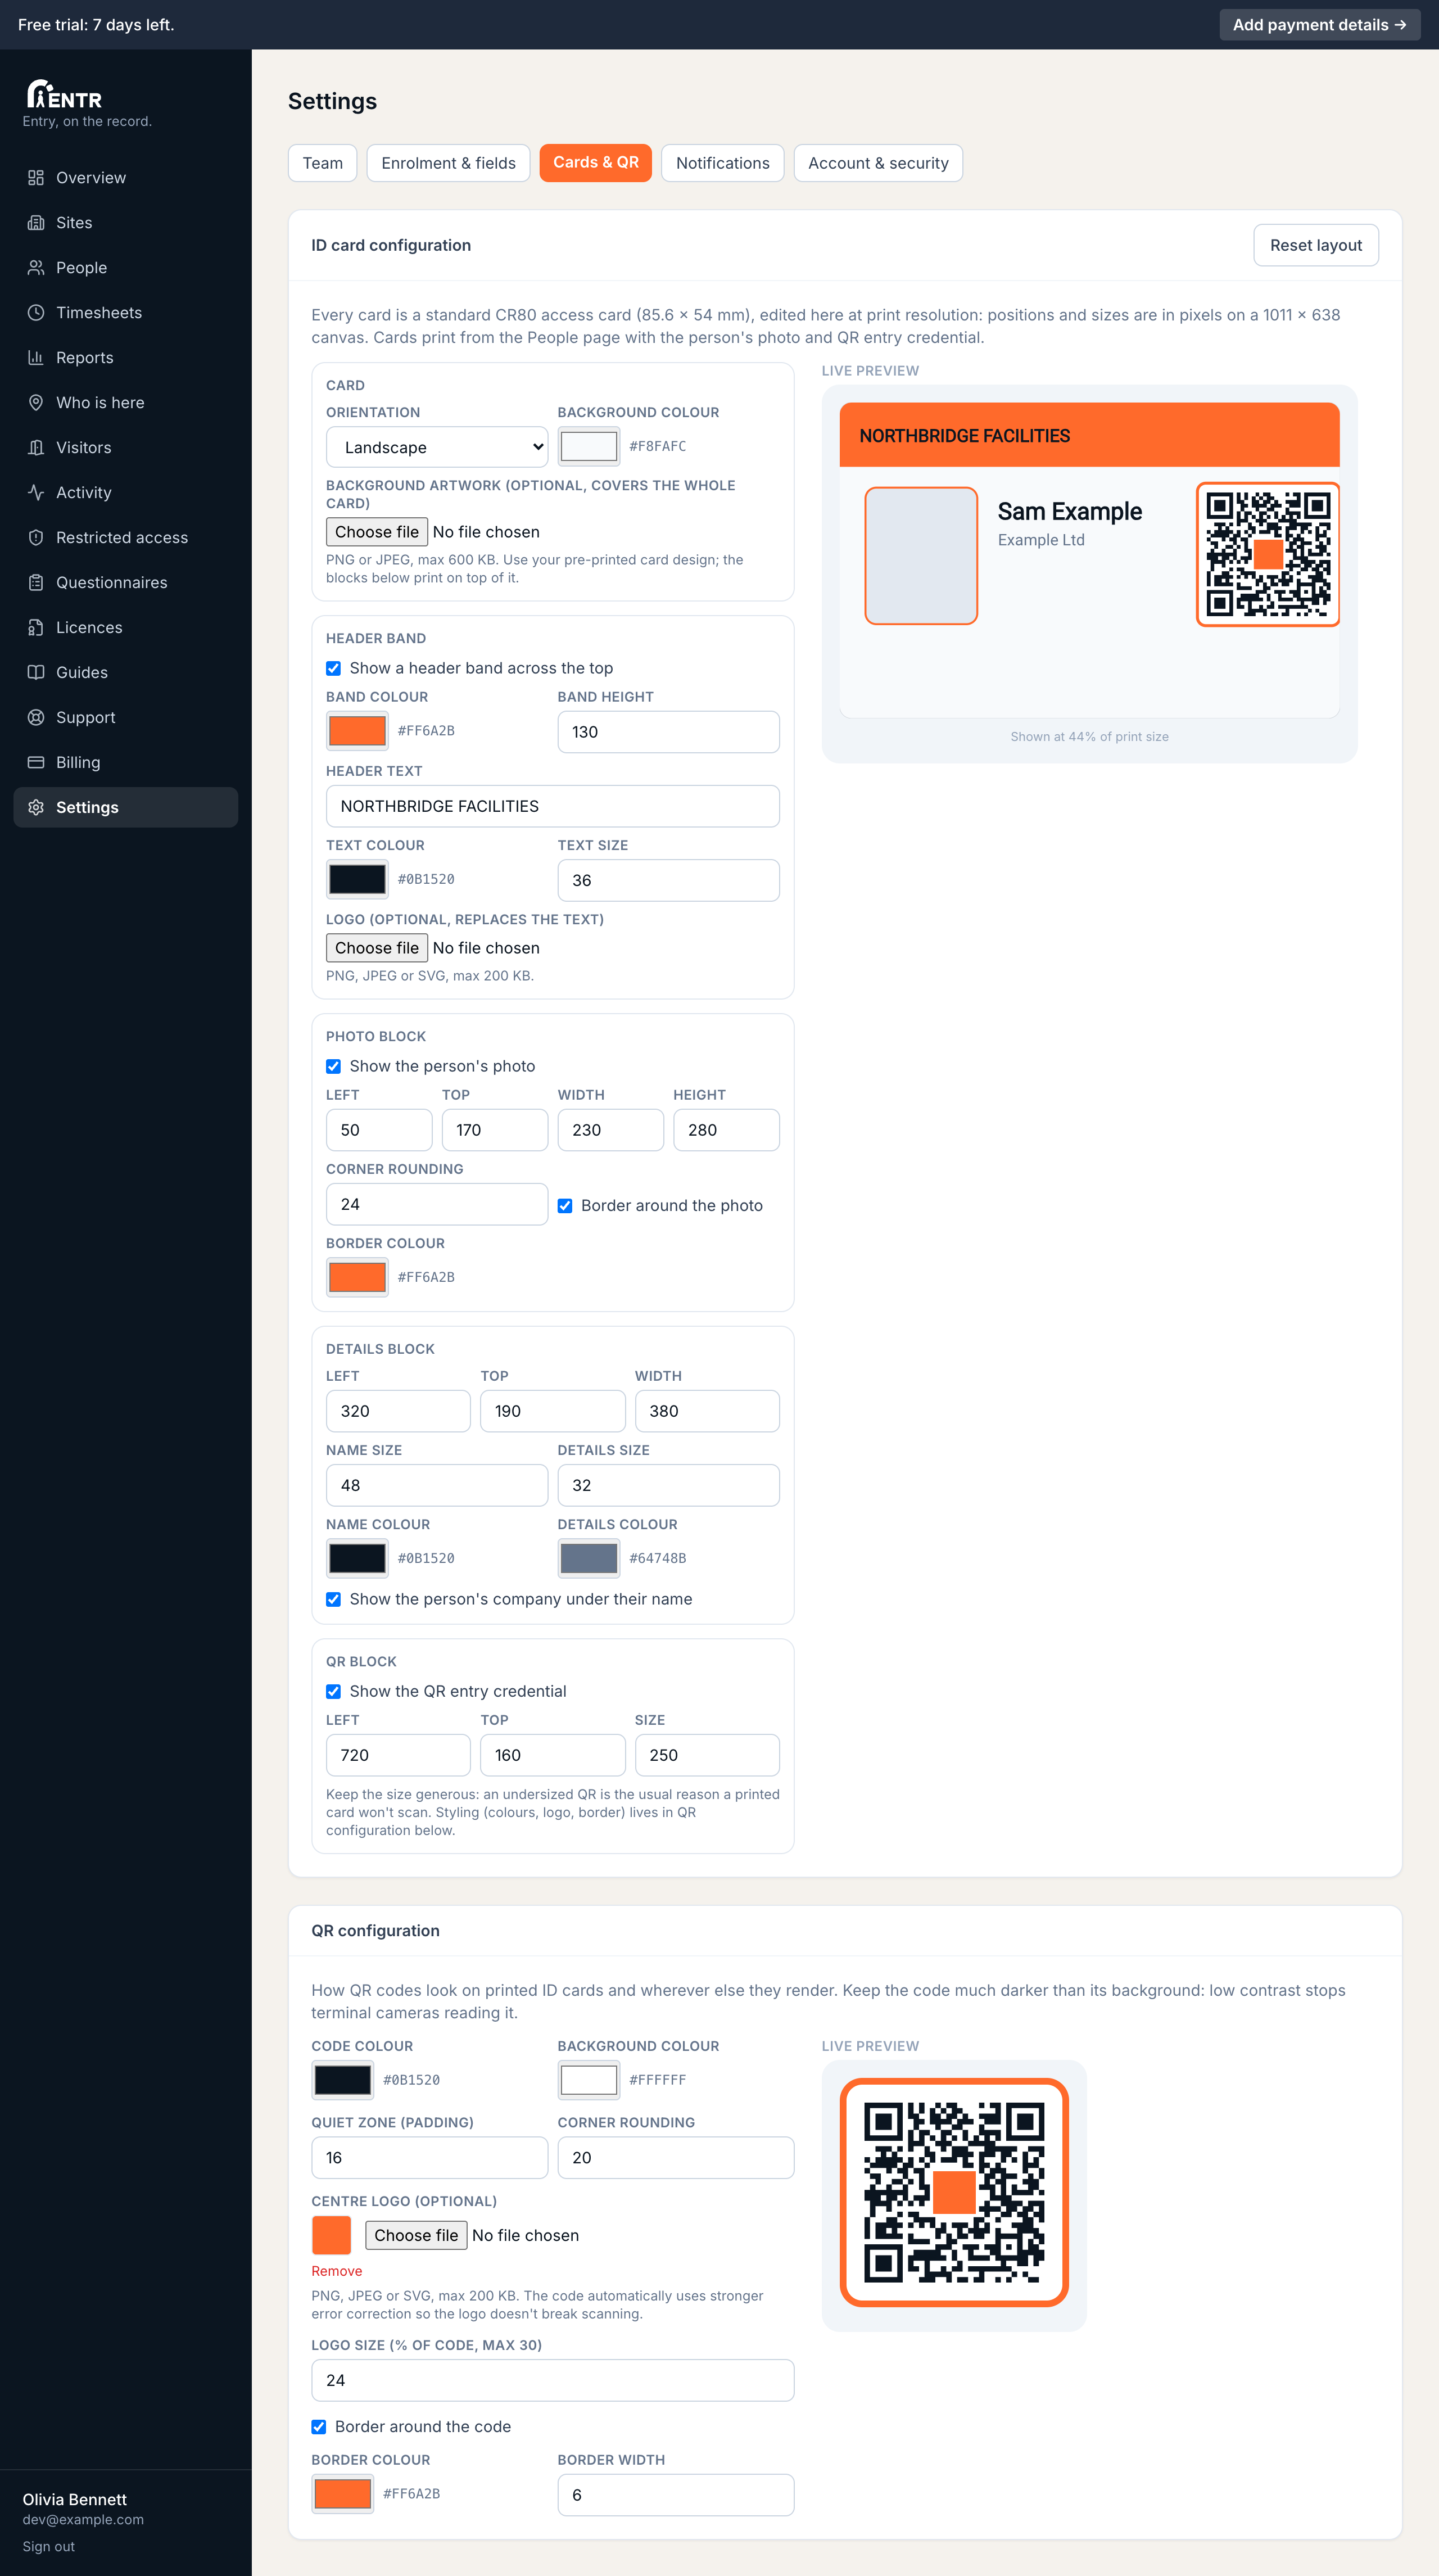
iENTR includes a full ID card designer: every card is a standard CR80 access card edited at print resolution, with your artwork, a header band and positionable photo, details and QR blocks. The live preview is exactly what prints.
7 min read · 5 steps
- 1
Open the card editor
Go to Settings, then Cards & QR. Every card is a standard CR80 access card (85.6 x 54 mm), edited at print resolution on a 1011 x 638 pixel canvas. The live preview on the right is exactly what prints.
- 2
Card basics
Choose landscape or portrait, set a background colour, or upload your pre-printed card artwork to cover the whole card. When you use artwork, the blocks below print on top of it.
- 3
The header band
The header band runs across the top: set its colour, height, text, text size. Upload a logo to replace the text; set the logo height to suit. Turn the band off entirely when your artwork already carries branding.
- 4
Position the blocks
Three blocks place with left, top plus size numbers: the photo (with corner rounding plus an optional border), the details block (name plus company with separate font sizes plus colours), the QR block. Each block can be hidden when you do not need it.
Keep the QR size generous. An undersized code is the usual reason a printed card fails to scan at the terminal.
- 5
Reset if you get lost
Reset layout returns the blocks to the default arrangement while keeping your colours, header, logos. Switching orientation also re-applies that orientation's default block layout.
Using iENTR at a workplace? See how the whole system fits your door.
iENTR for workplaces →Related guides
Try it on one door.
Seven days free, cancel any time. Mount the iPad, pair it with one code and you are running inside half an hour.