
Terminals
Adding a terminal
You add a terminal by installing the iENTR app on an iPad, creating a one-time pairing code from the site page in the dashboard, then entering that code on the iPad. The terminal joins the site, downloads its roster and is ready in minutes.
5 min read · 4 steps
- 1
Get the app on the iPad
Install iENTR from the App Store on the iPad that will live at your door or desk. Open it: a fresh install starts on the setup screen.
- 2
Create a pairing code
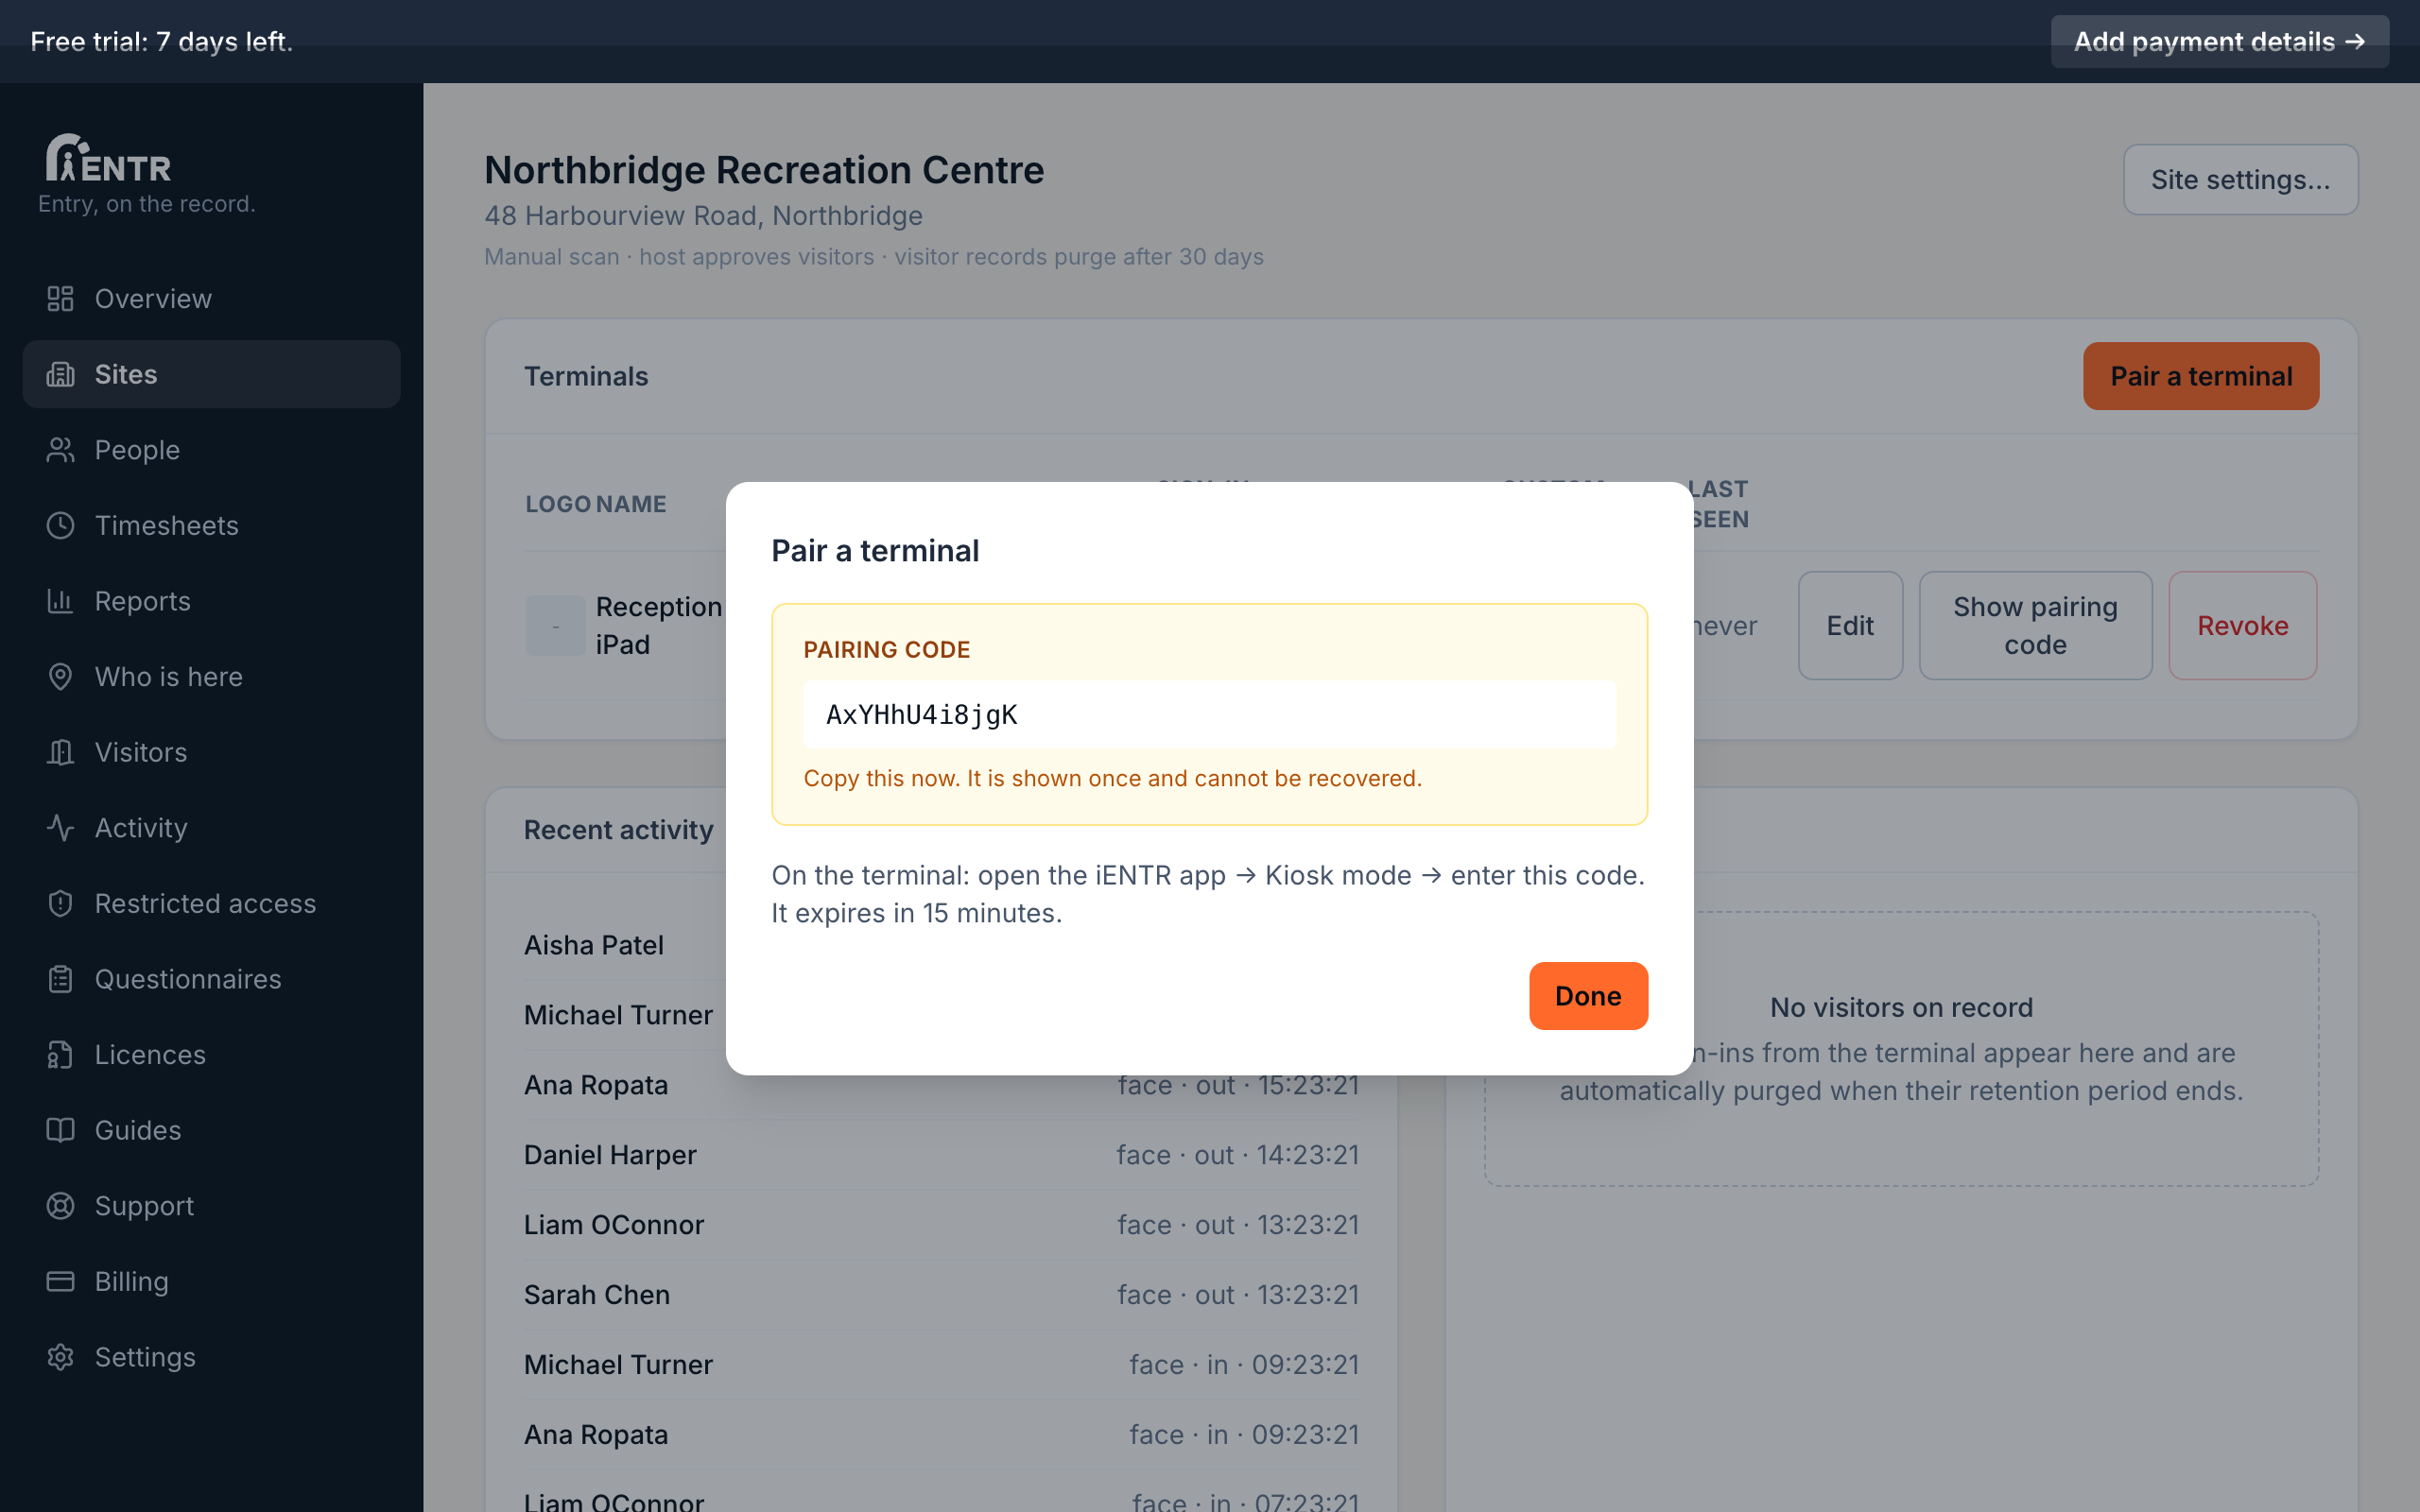
In the dashboard, open the site, press Pair a terminal. Give the terminal an entry name people will recognise, for example Main Entrance or Reception iPad. The dashboard shows a one-time pairing code.
- 3
Enter the code on the iPad
Type the code into the app. The terminal joins your site, downloads its roster, shows the site name plus its entry name on screen from then on.
- 4
Choose the terminal mode
Setup finishes by asking what this terminal is for. Access mode is the everyday locked door screen. Enrol mode turns the iPad into a registration station for onboarding days. You can change the mode later in the terminal settings.
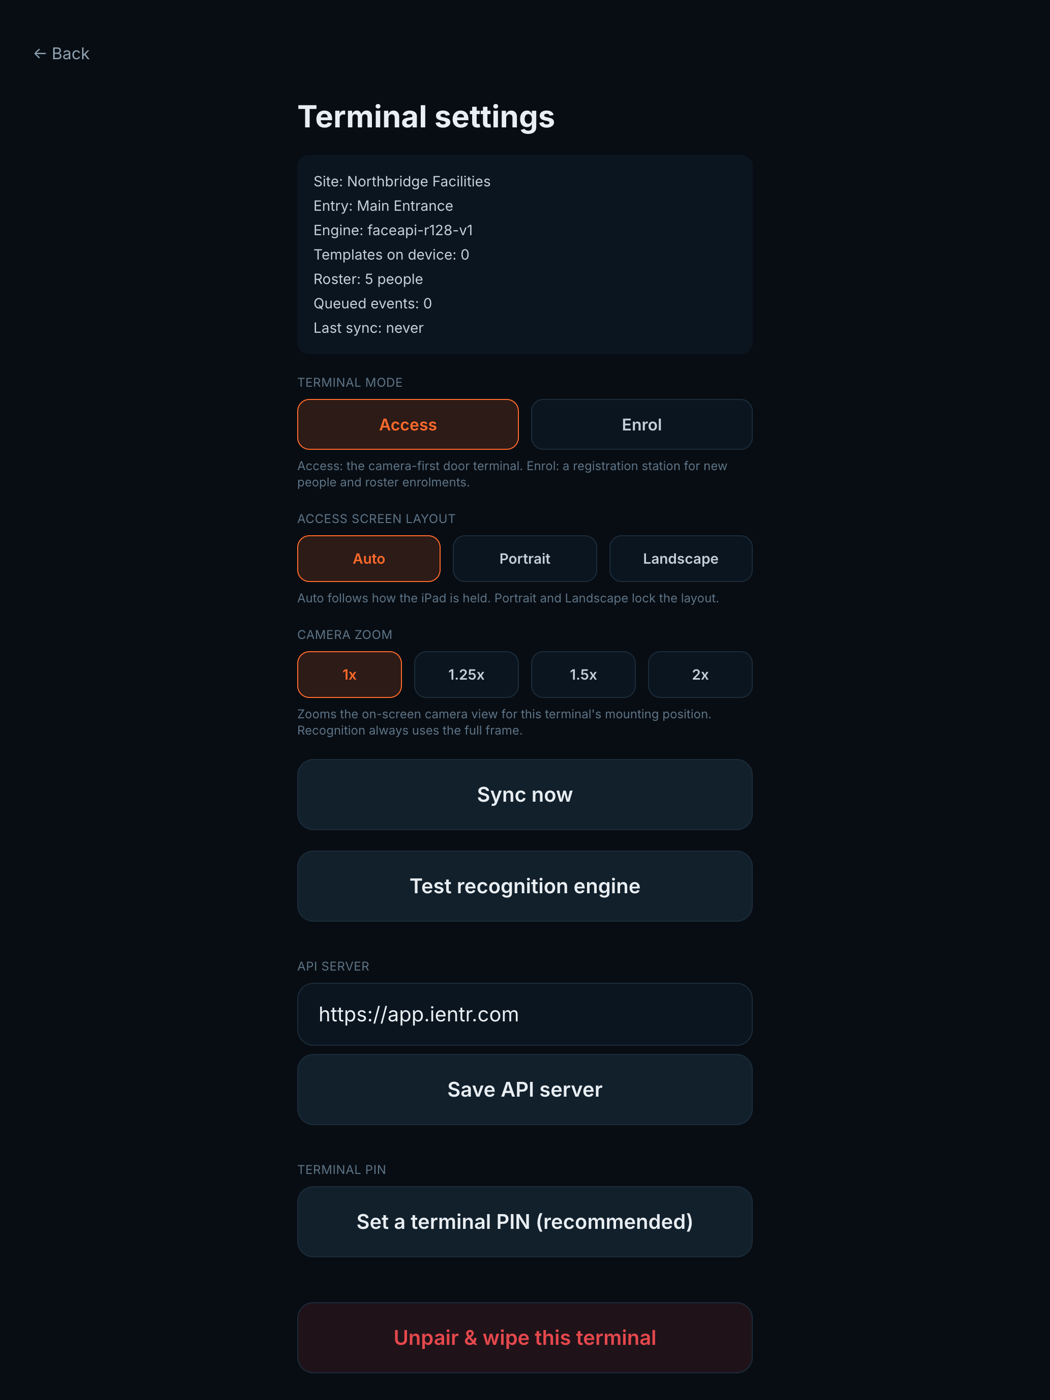
Set a terminal PIN in the settings screen straight away. The PIN protects the settings gear so nobody at the door can change the terminal.
Using iENTR at a construction site? See how the whole system fits your door.
iENTR for construction →Try it on one door.
Seven days free, cancel any time. Mount the iPad, pair it with one code and you are running inside half an hour.