
Getting started
Initial setup checklist
Setting up iENTR takes four steps in order: create your first site, invite your teammates, pair an iPad terminal with a one-time code, then add your people and enrol their faces. Most accounts are running their first door inside half an hour.
5 min read · 5 steps
- 1
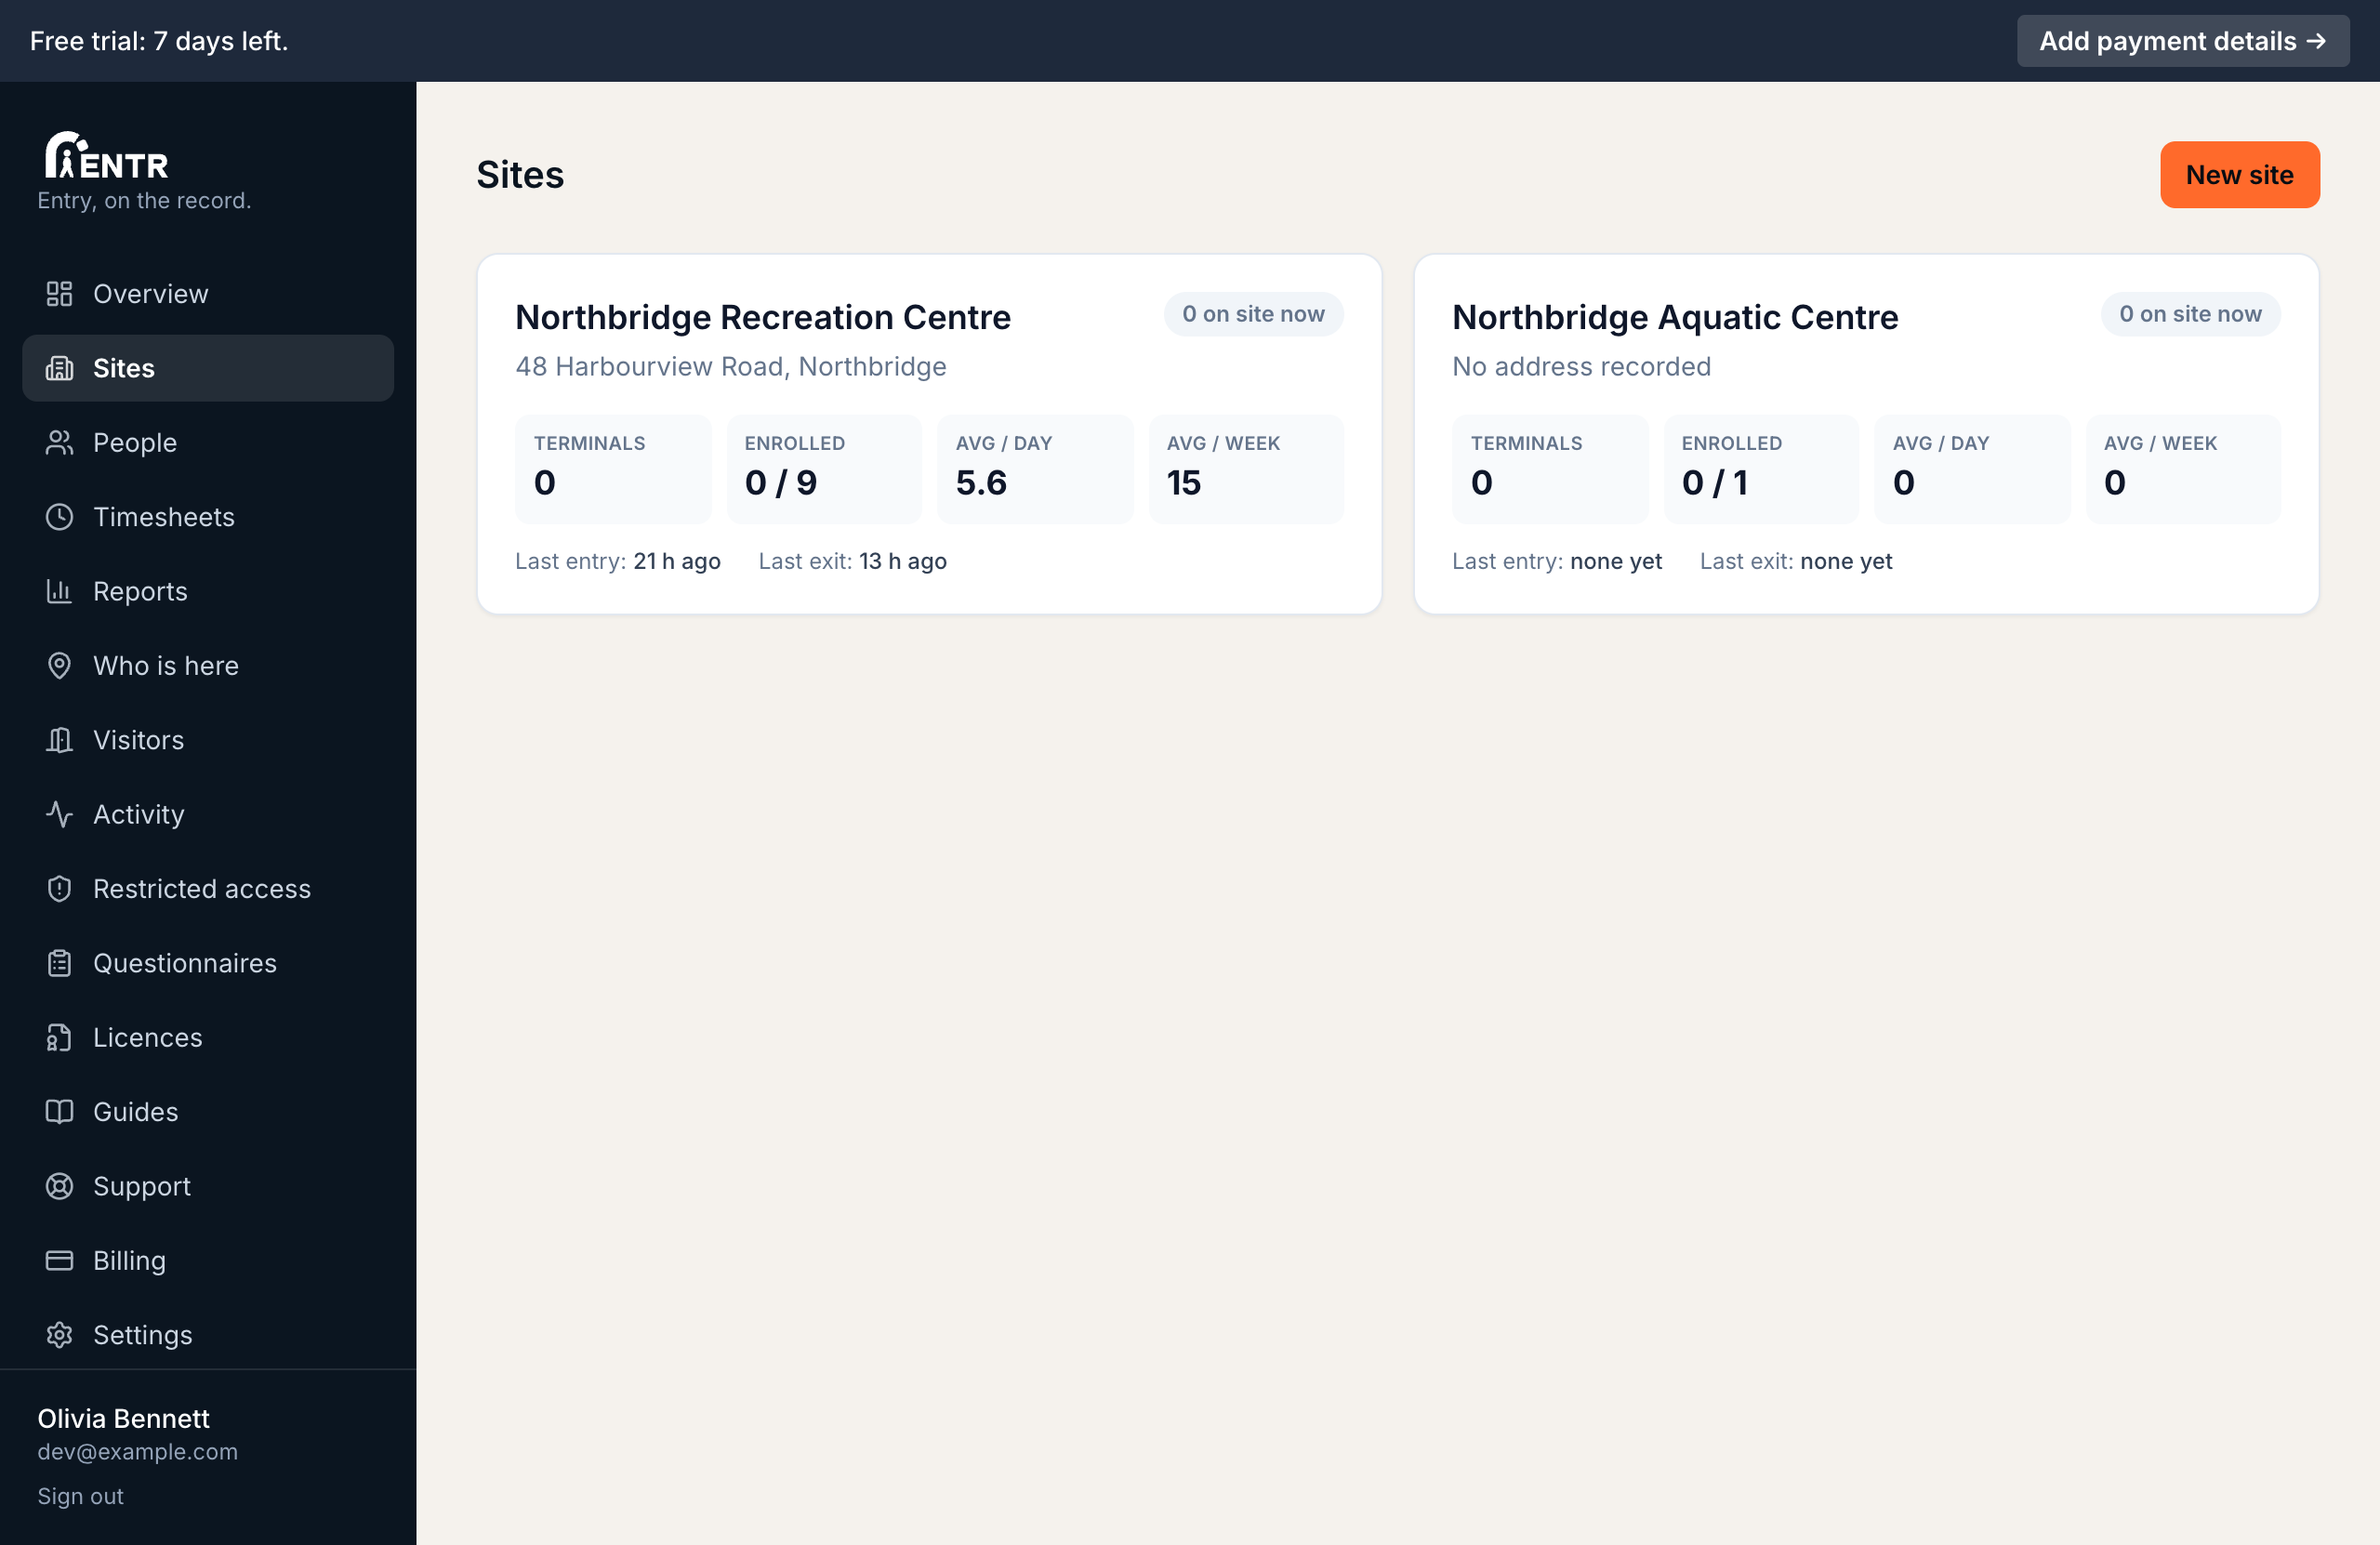
Create your first site
A site is a physical place people sign in to: a gym, an office, a construction site, a preschool. Open Sites in the menu, press Add site, give it a name plus an address. Everything else (people, terminals, reports) hangs off a site.
- 2
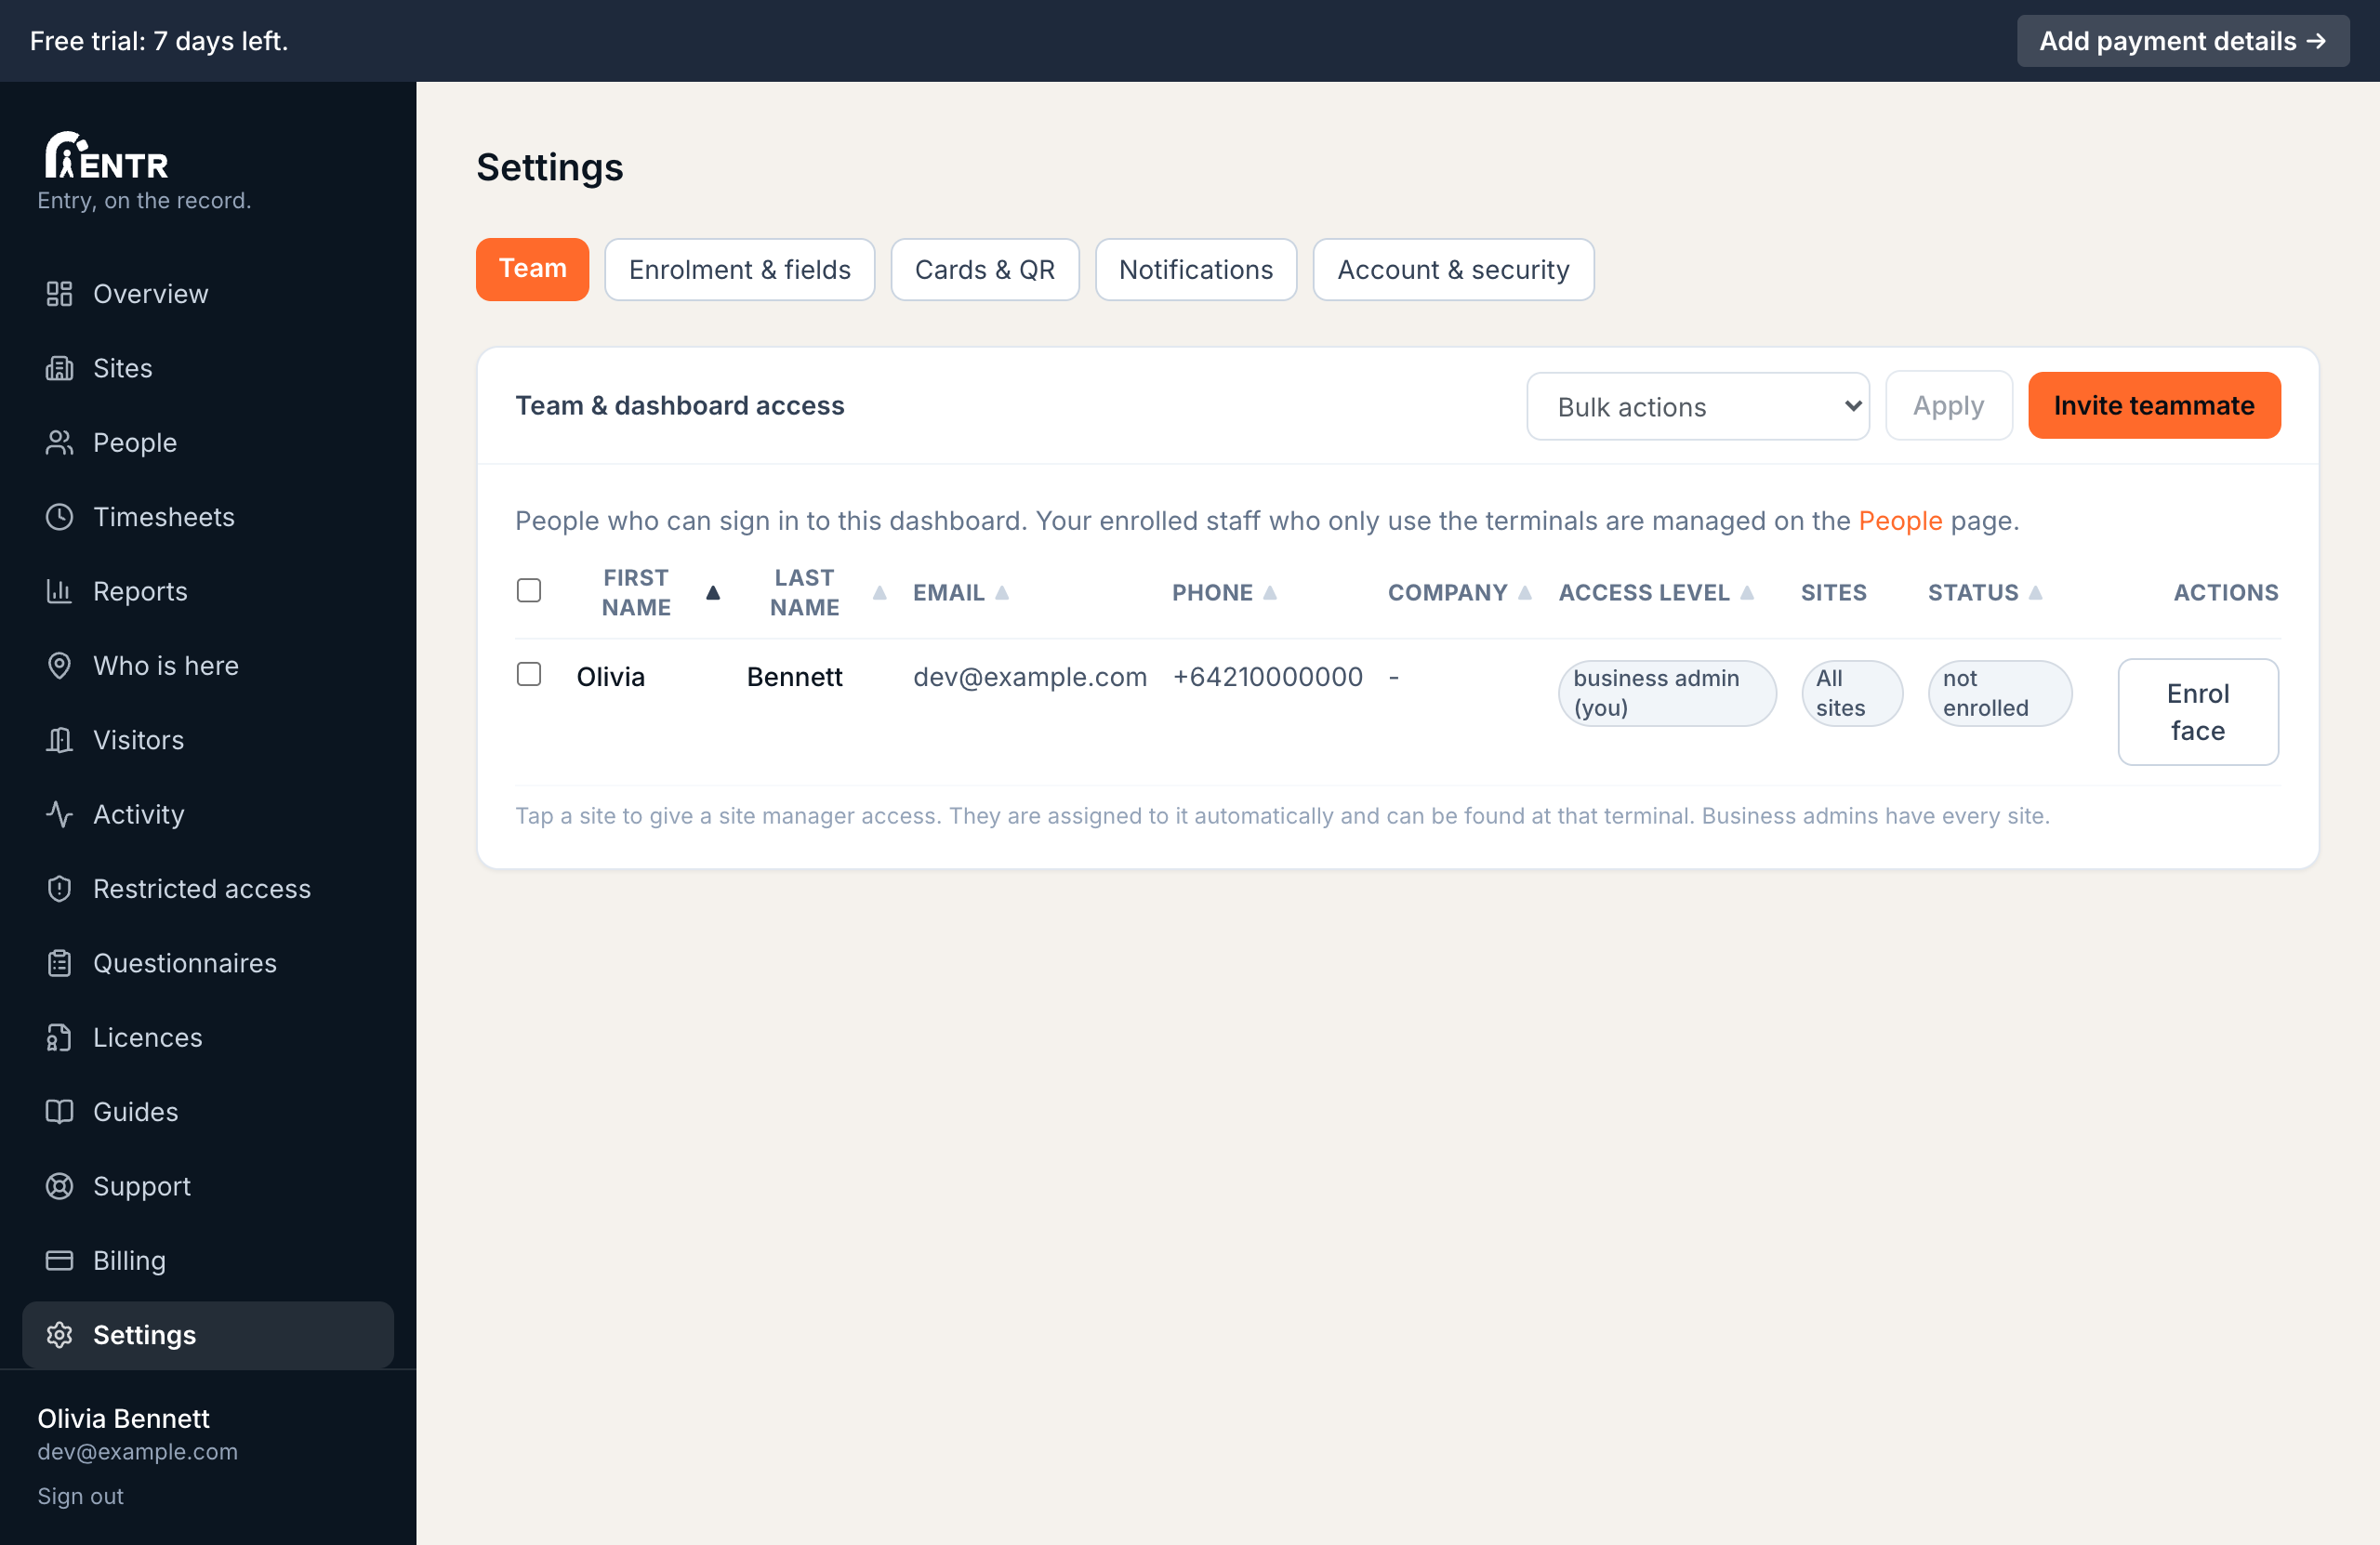
Invite your teammates
Open Settings, then the Team tab. Invite the other people who should manage the dashboard. Business admins see everything; site managers see just their assigned sites.
- 3
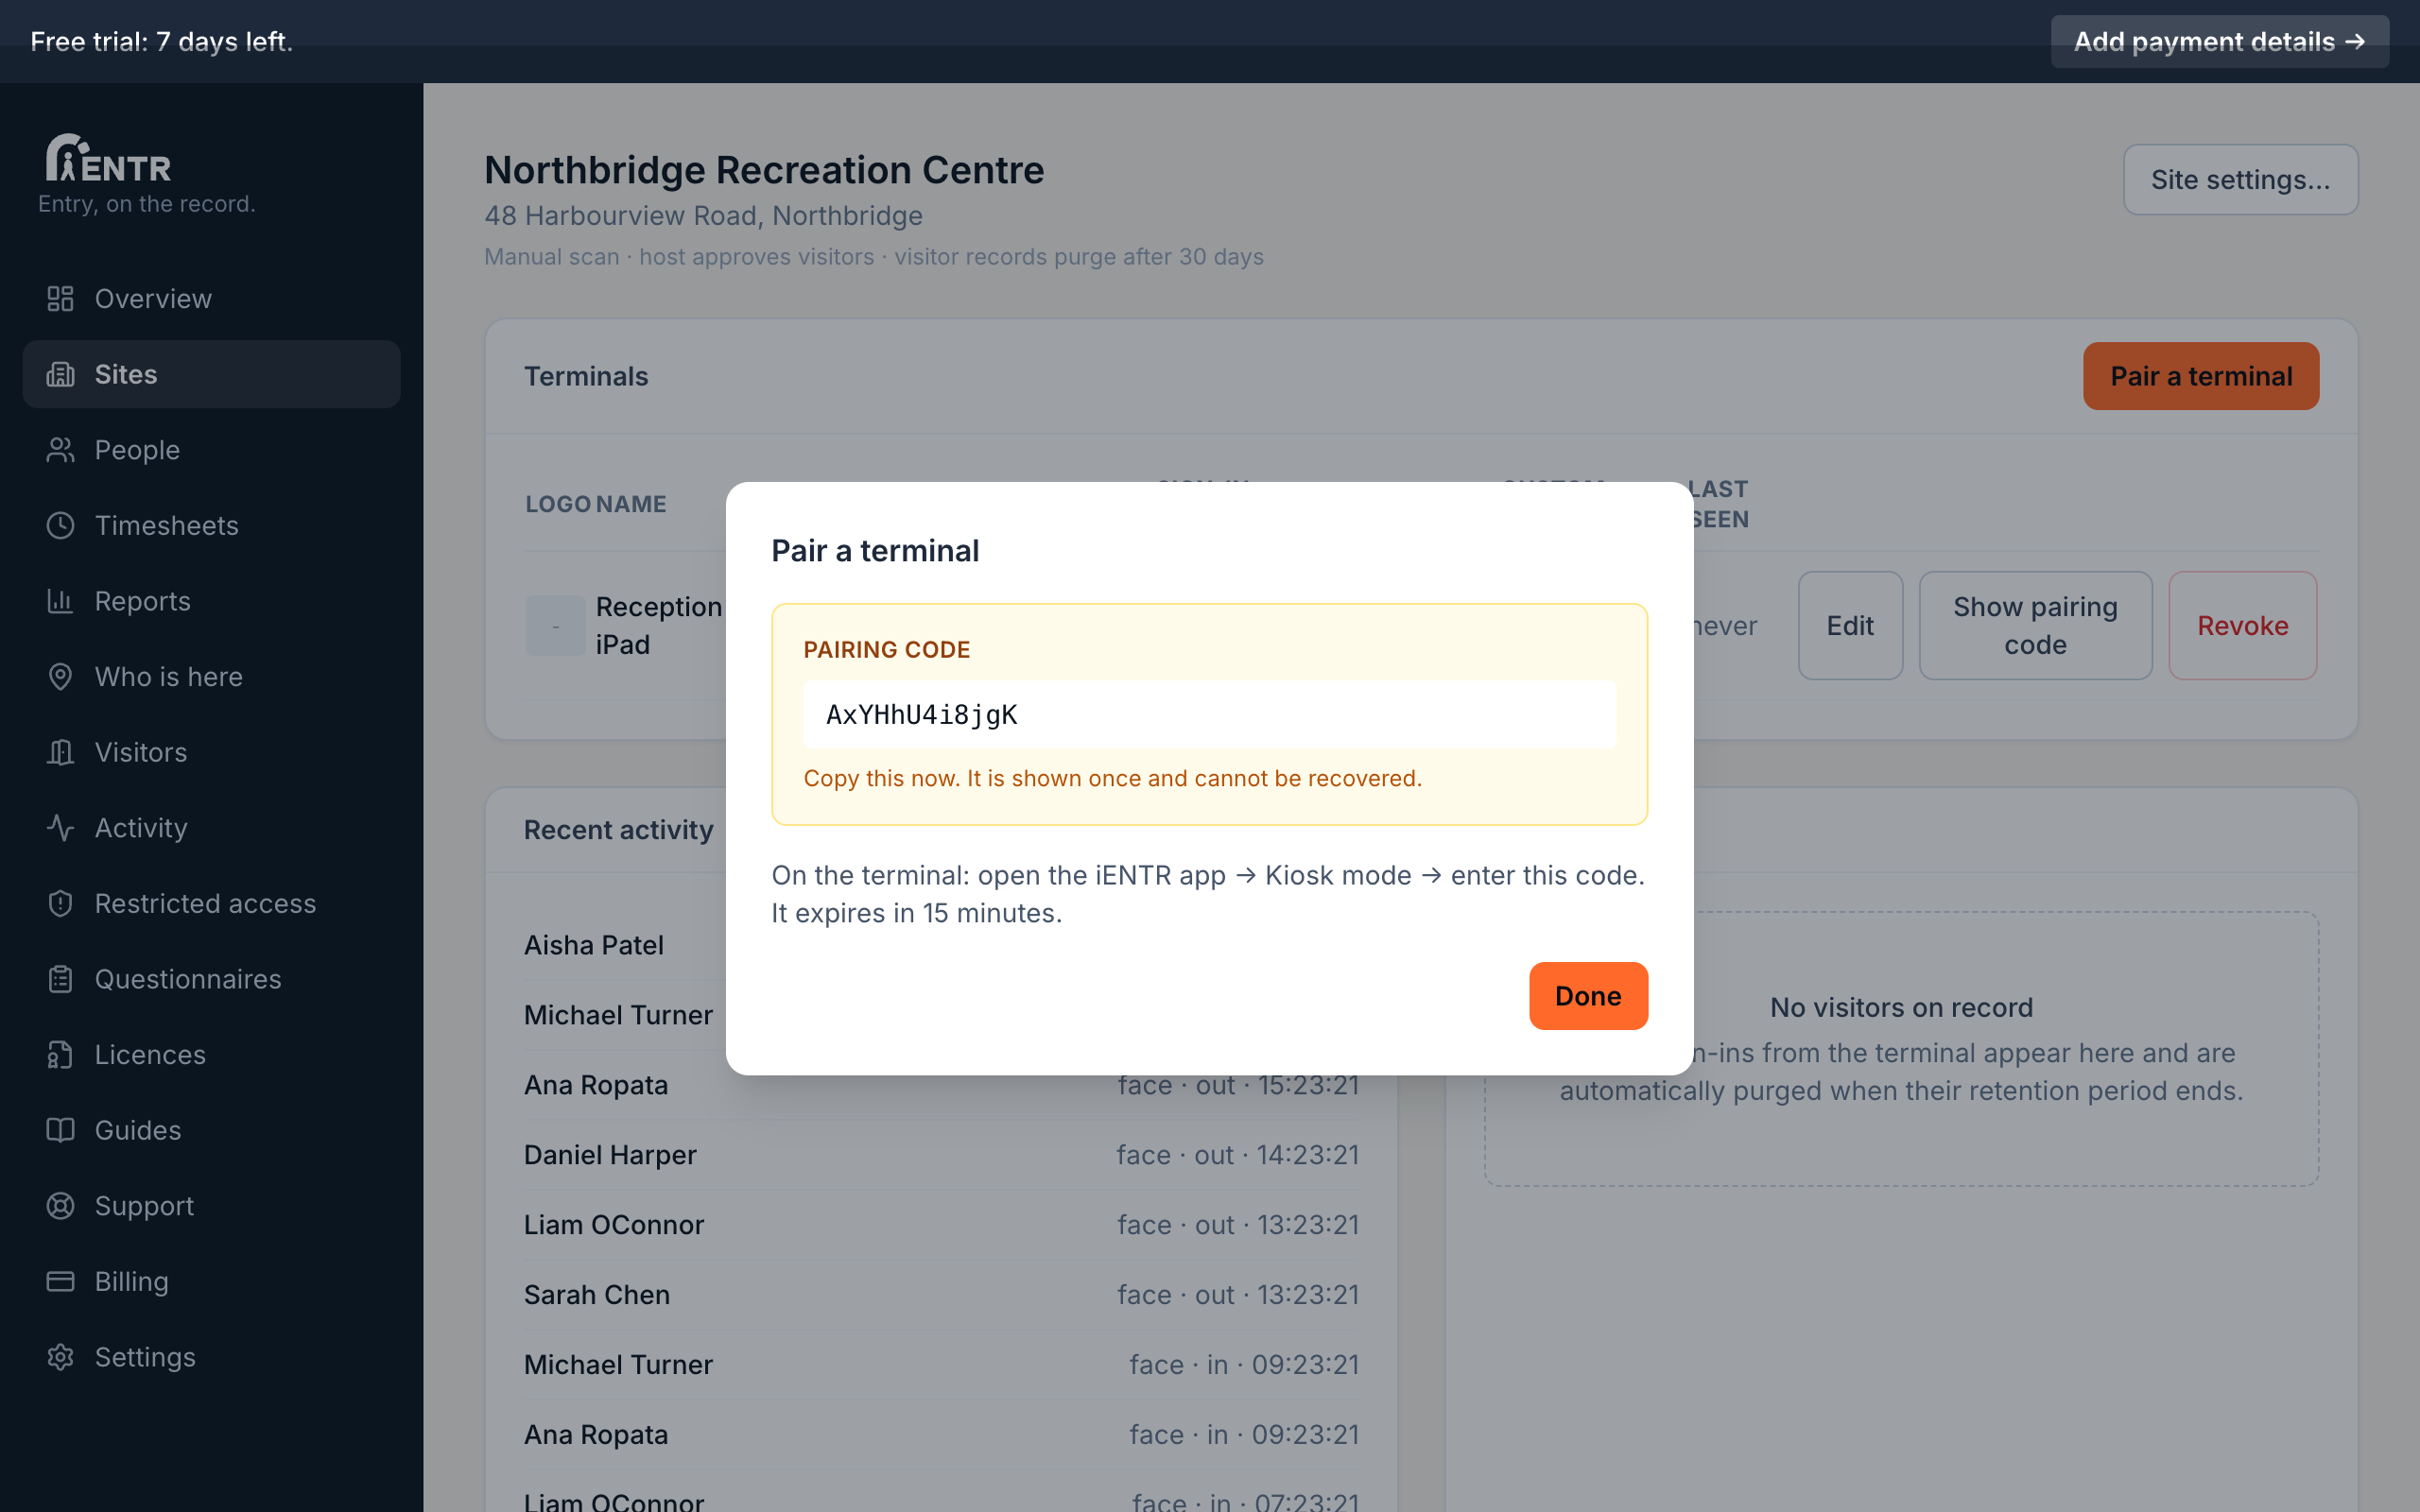
Pair a terminal
Install the iENTR app on the iPad that will live at your entrance. In the dashboard, open your site, press Pair a terminal to get a one-time code, then enter that code on the iPad. The full walkthrough is in the Adding a terminal guide.
- 4
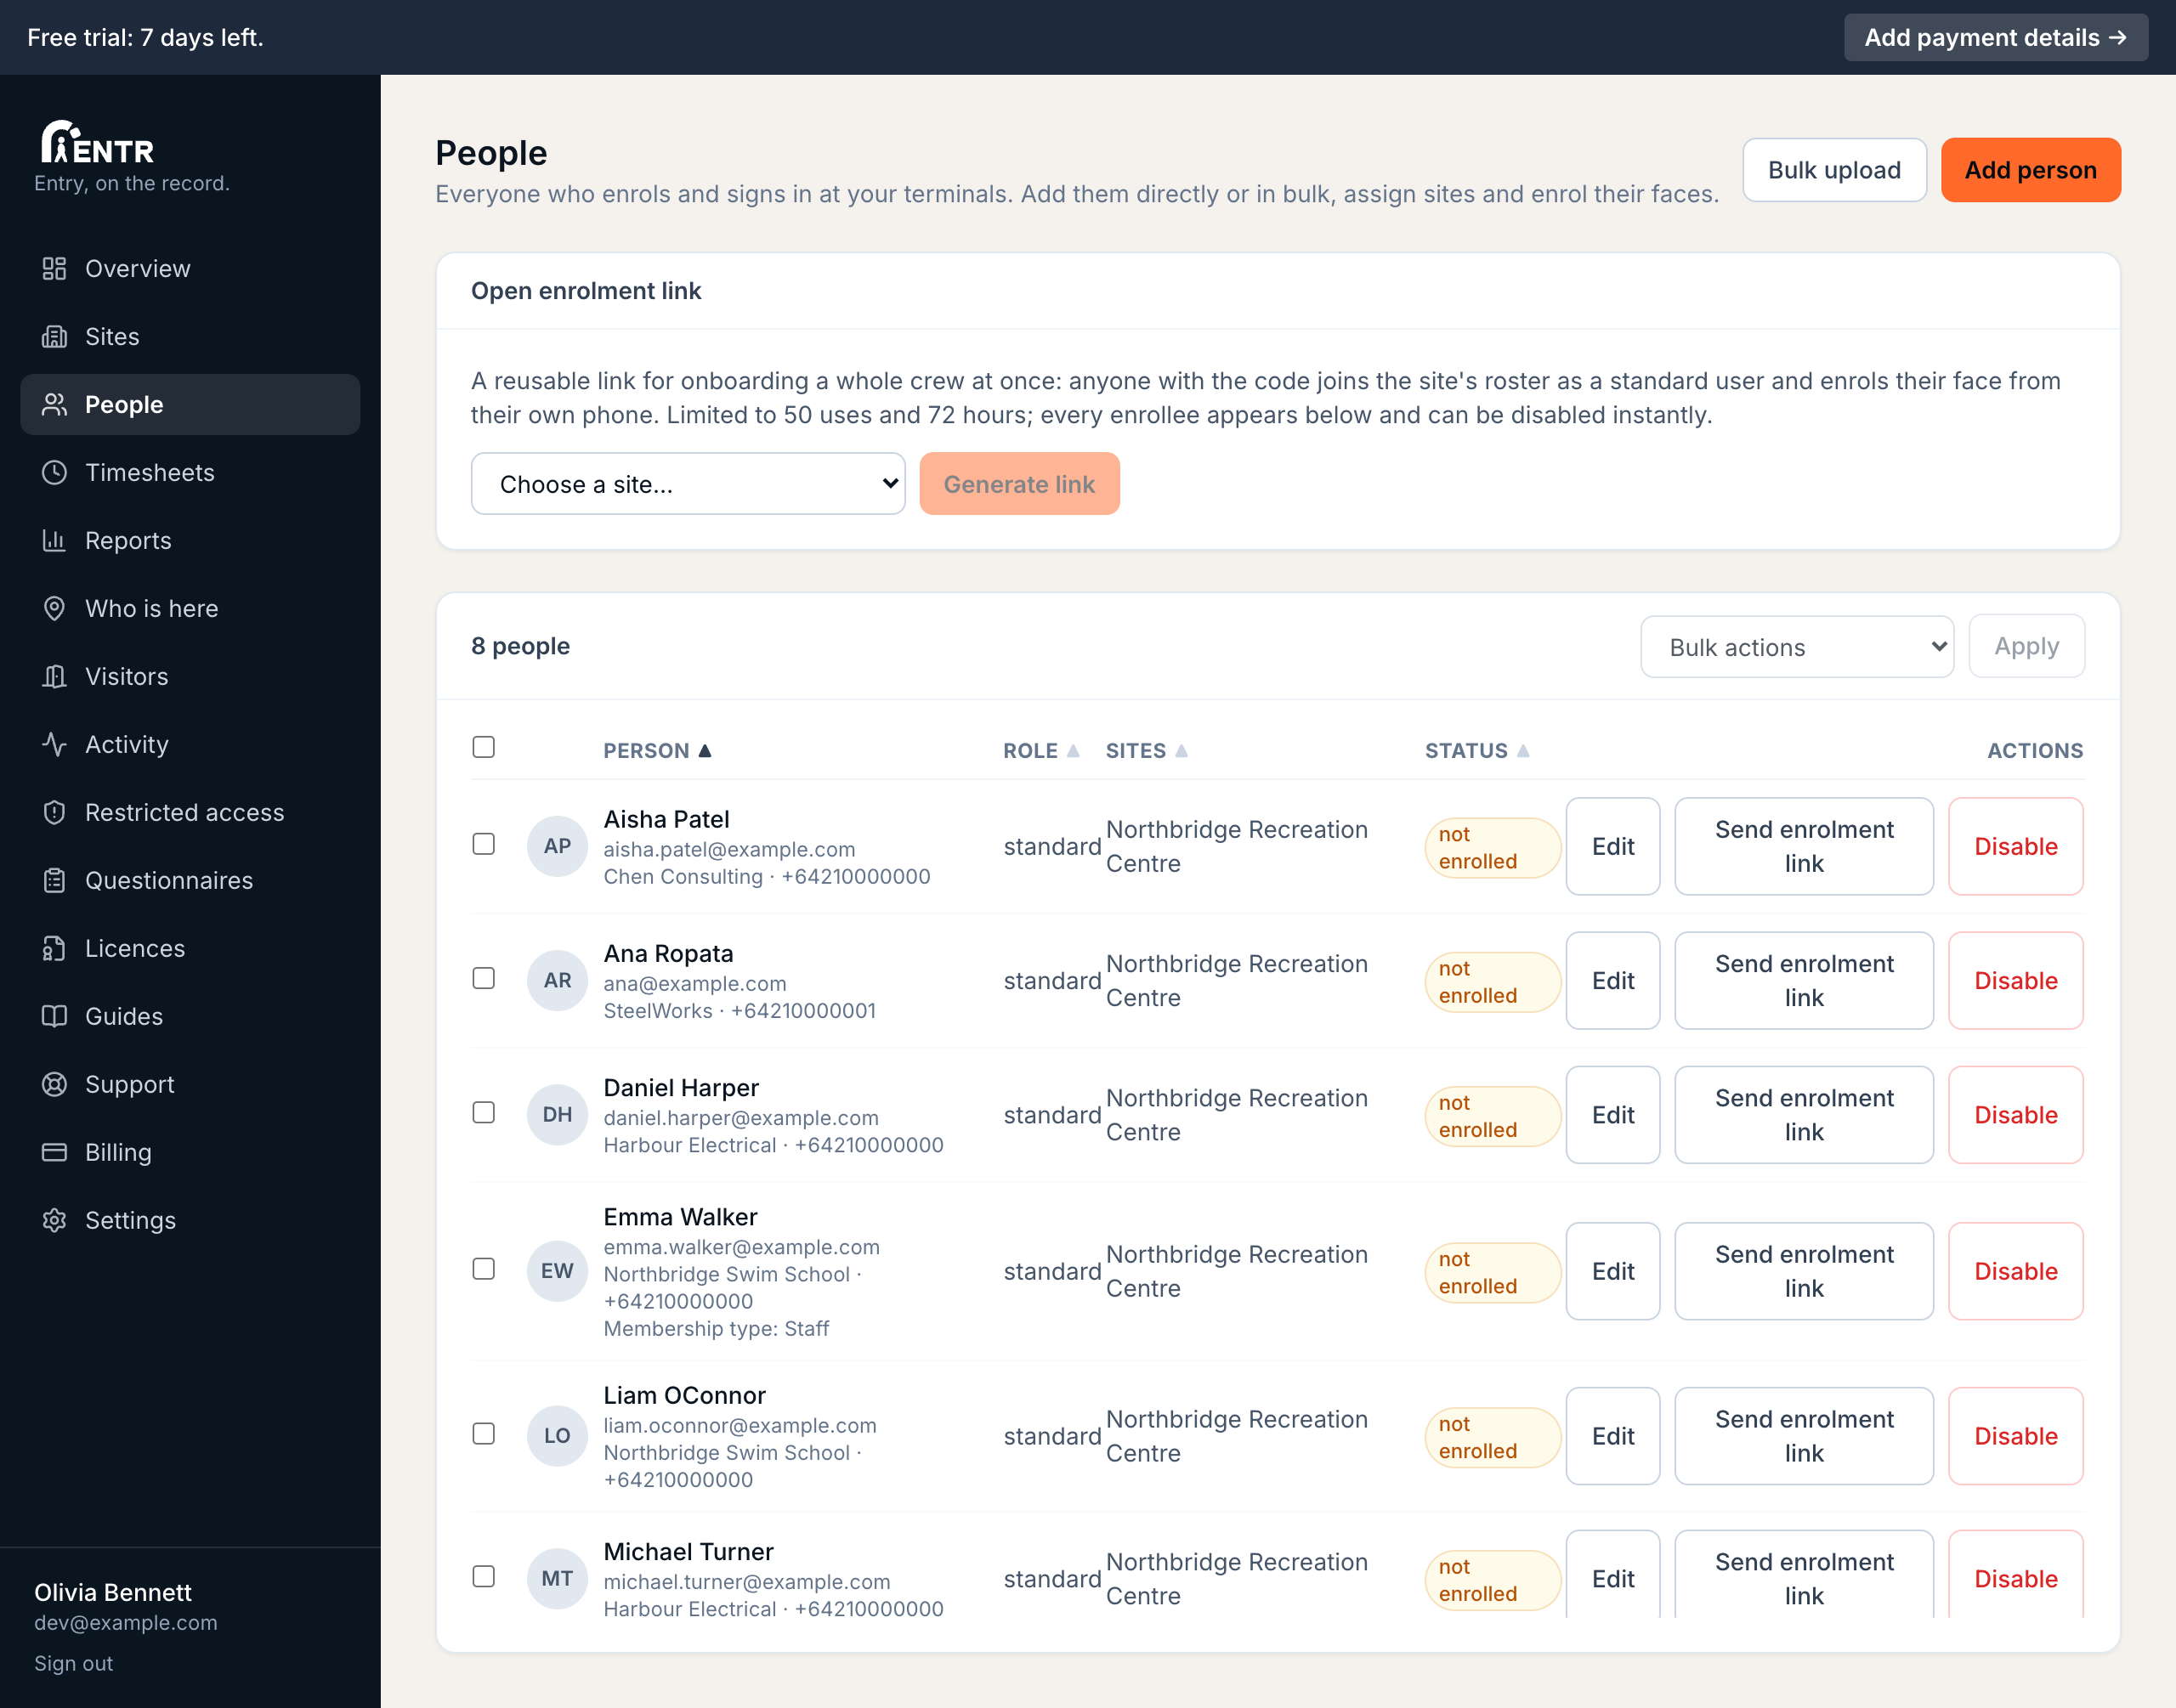
Add your people
Open People, press Add person for individuals or Bulk upload for a whole list. Then send enrolment links so everyone can register their face from their own phone. The User onboarding guides cover every option.
- 5
Check your settings
Before launch day, skim the Settings tabs: custom enrolment fields, notification wording, ID card design. Each has its own guide in the Advanced sections below.
Run a test sign-in yourself before your first real day. Enrol your own face, walk up to the terminal, watch the entry appear under Activity.
Using iENTR at a construction site? See how the whole system fits your door.
iENTR for construction →Related guides
Try it on one door.
Seven days free, cancel any time. Mount the iPad, pair it with one code and you are running inside half an hour.